Choose a Wardrobe and Wear an Outfit
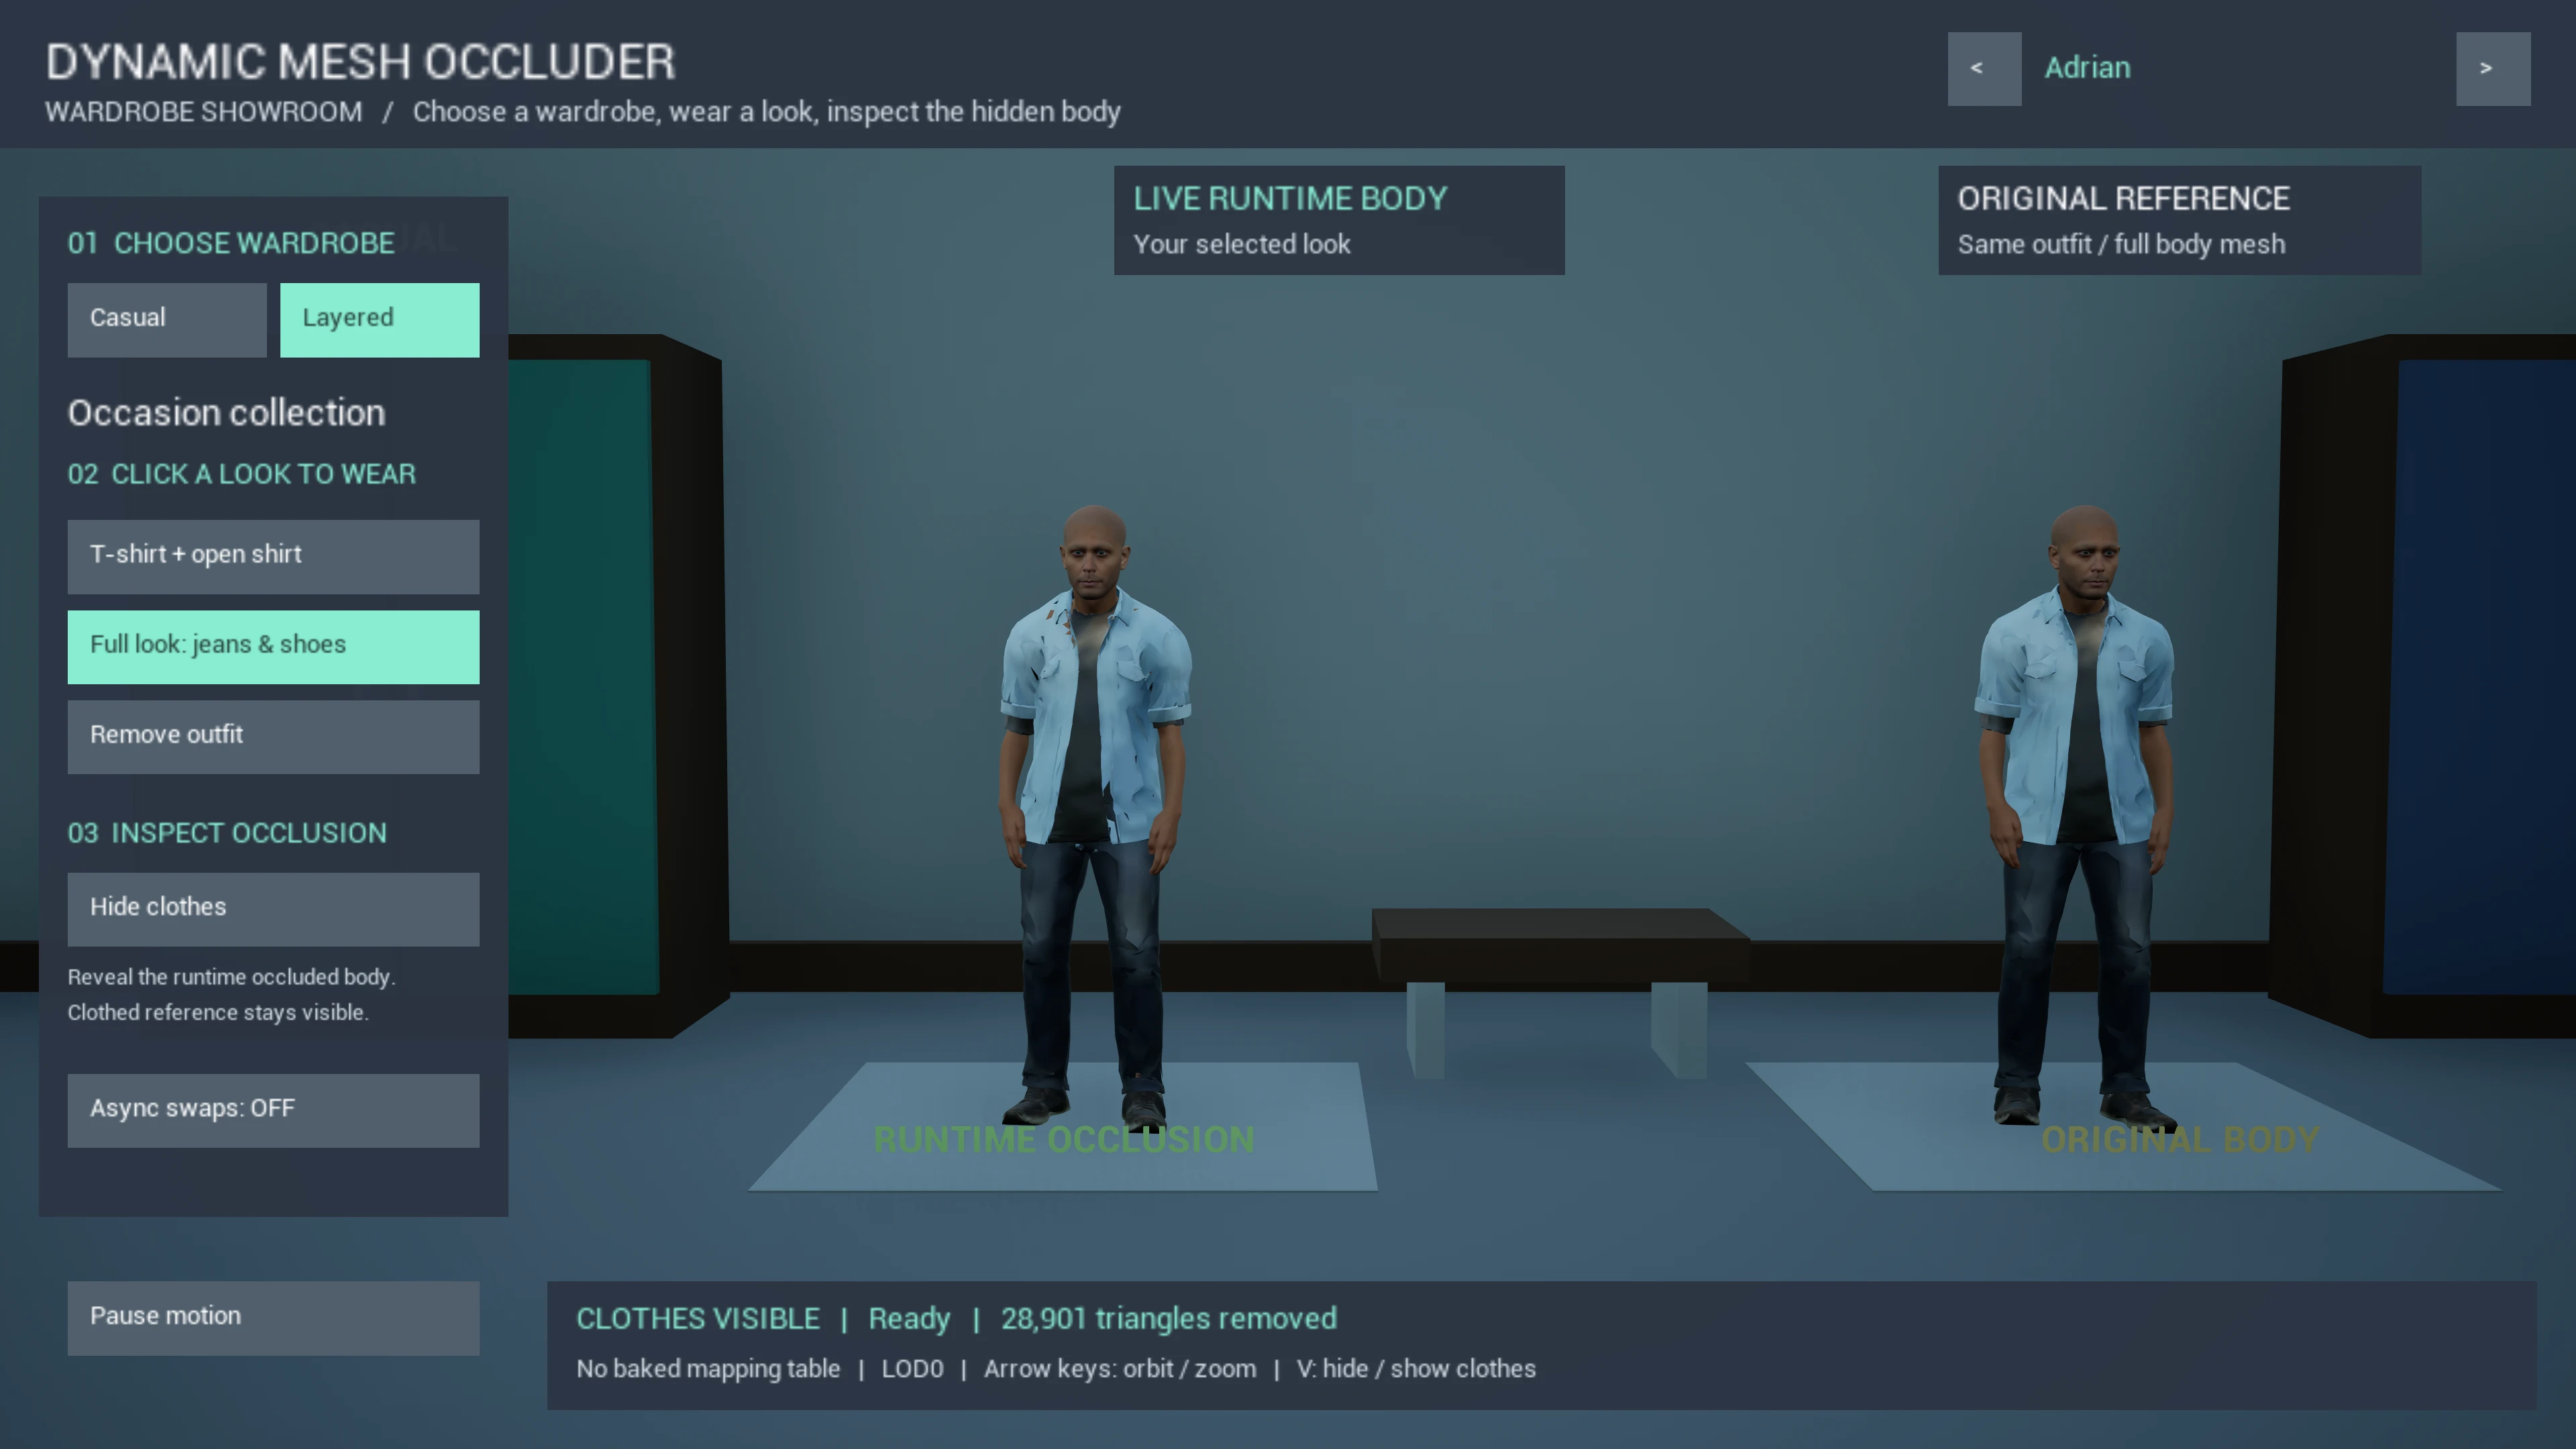
In the DMO example project, open /Game/Maps/L_RuntimeClothingSwap and press Play. Use the character arrows to choose Adrian, Clara, Valentina, or Eve. Each character has its own wardrobe. The two characters let you compare the original body with the trimmed body generated when you change outfits. This example generates occlusion at runtime without a saved mapping table.
The showroom starts dressed. Choose Casual, Layered, or Evening in the wardrobe panel, then click one of that character's available looks. Click Hide clothes to inspect the generated body; the reference character remains clothed. Click Show clothes to return. Selecting a different look always shows its clothing again. If PIE is ejected into editor inspection, press F8 to return to gameplay and see the buttons.
Use the async swap toggle to generate body occlusion in the background. Pause or resume motion to inspect the result at a particular pose. To use your own meshes, follow Runtime Setup for the required mesh settings.
Open /Game/Examples/Blueprints/BP_RuntimeOcclusionRecipes for a complete wardrobe Actor with Body, Face, TopGarment, BottomGarment and Occluder components. Its five connected workflows include garment assignment, pose sharing, runtime occlusion, completion handling and removal.
- EventGraph: BeginPlay sets the source body, shares its pose with the face and garments, binds OnRuntimeOcclusionFinished, then equips the default outfit.
- EquipOutfit: Pass TopMesh, BottomMesh and Async. The graph restores the source body, assigns both garments, builds the complete active outfit array and calls the native synchronous or asynchronous occlusion node.
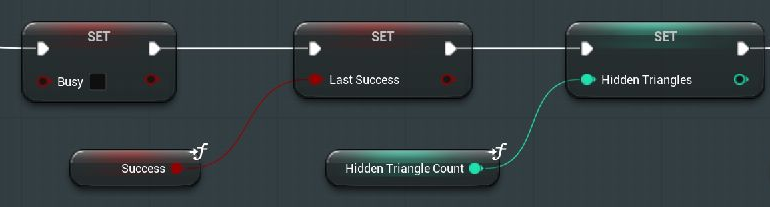
- OcclusionFinished: The delegate clears Busy, records LastSuccess and HiddenTriangles, and restores the original body on failure.
- SetClothesVisible: Pass Visible from the wardrobe UI to show or hide both garments while preserving the generated body for cutaway inspection.
- RemoveOutfit: Restore the original body, cancel pending work, clear both garment meshes and reset wardrobe state.
Set DefaultTop and DefaultBottom on the placed Actor and connect your wardrobe buttons to EquipOutfit, SetClothesVisible and RemoveOutfit. Use Busy to disable controls during background work. Pass the complete active outfit on every swap. The packaged showroom uses the same native plugin API from C++; this separate Blueprint Actor demonstrates the connected implementation for your own UI.
| Character | Example wardrobe |
|---|---|
| Adrian | Printed T-shirt, shirt, layered tops, and jeans/shoes. |
| Clara | Casual top and evening dress. |
| Valentina | Evening dress on its original character. |
| Eve | Tripo fantasy upper armor, skirt, leggings, and layered combinations. |
| Key | Action |
|---|---|
| 0 | Remove clothing and restore the original body. |
| 1 / 2 / 3 / 4 | Select a look from the current character's wardrobe; keys are limited to its available looks. |
| V | Hide/show the runtime character's clothes while preserving its generated mesh. |
| A | Toggle synchronous or asynchronous outfit swaps. |
| C | Clear runtime mesh caches and restore the original body. |
| Space / Arrow keys | Pause animation, orbit the camera, or zoom. |
Read the Result
The wardrobe panel shows when occlusion is building or ready, along with the number of triangles removed. Choose a layered look, then use Hide clothes to see the trimmed body. Show the clothes again and watch the character move, paying attention to cuffs, necklines and other exposed edges. Press 0 to remove the outfit and restore the full body.
For integration, call Apply Occlusion For Clothing Components when the equipped components change. Empty slots are ignored. A mapping-table hit swaps the baked body; a miss with runtime fallback enabled generates a posed trim. Use Apply Runtime Occlusion for Clothing Async and its completion event for asynchronous body requests. An empty clothing array restores the original body. A false return means nothing was hidden.