Open the Connected Example
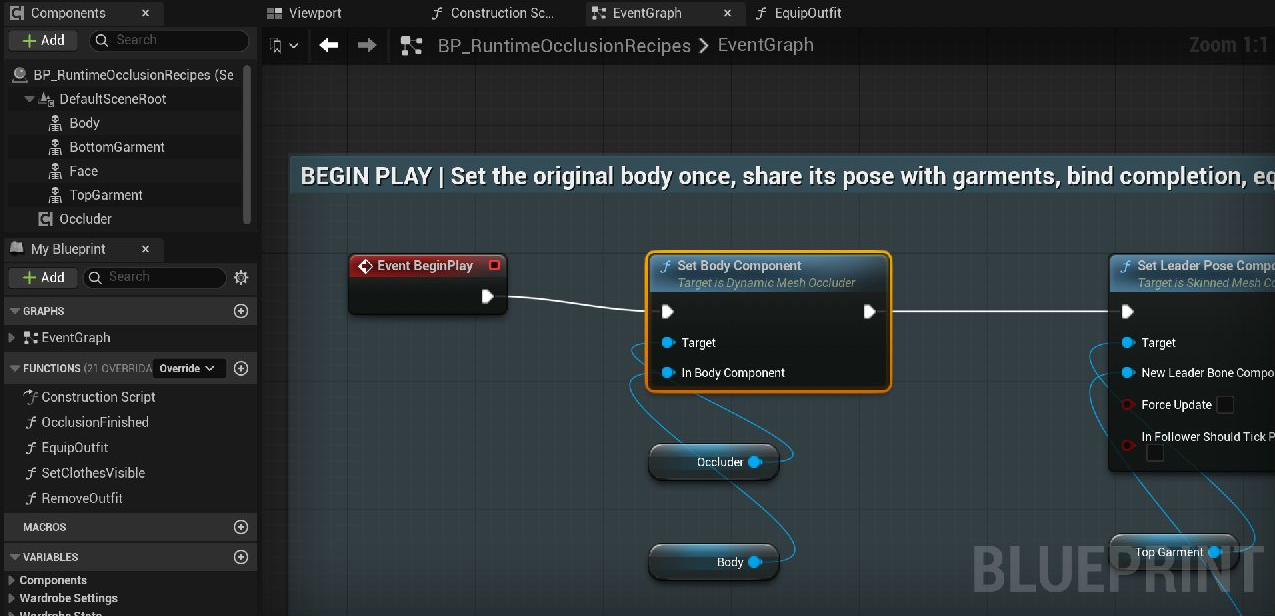
Open /Game/Examples/Blueprints/BP_RuntimeOcclusionRecipes in the example project. The component tree contains Body, Face, TopGarment, BottomGarment and Occluder. These are example component names; your character can use its own names. These screenshots were captured directly in this project's Blueprint editor. Focused views keep node labels and wiring readable; no video frames or generated Blueprint UI are used.
1. Assign the Body Once
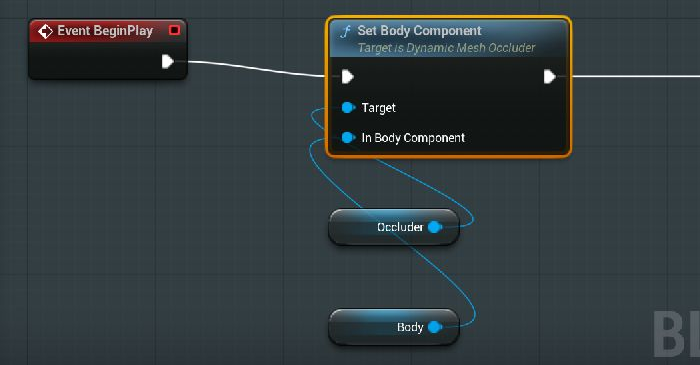
In BeginPlay, call Set Body Component. Connect Occluder to Target and the skin-rendering Body component to In Body Component. Do this before equipping the first outfit. The example also shares the body pose with its face and garments.
2. Assign the Clothes and Build the Complete Outfit
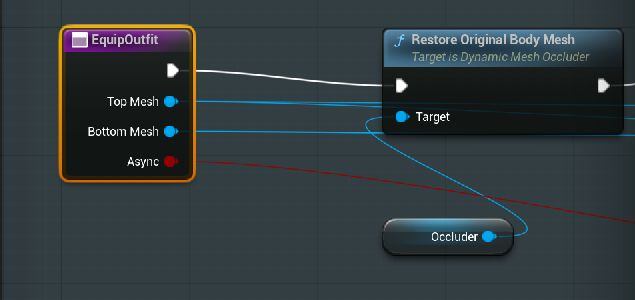
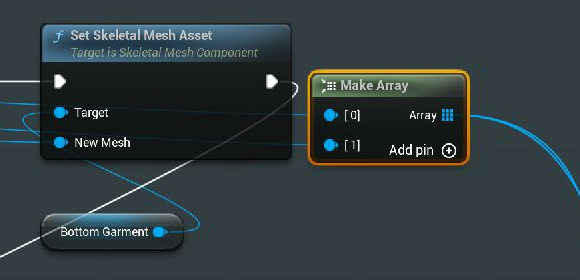
Open EquipOutfit. Its inputs are TopMesh, BottomMesh and Async. Restore the source body, assign the new garments to their components, then build an array of everything still equipped. Call this when an outfit changes, never on Event Tick.
3. Request Runtime Occlusion
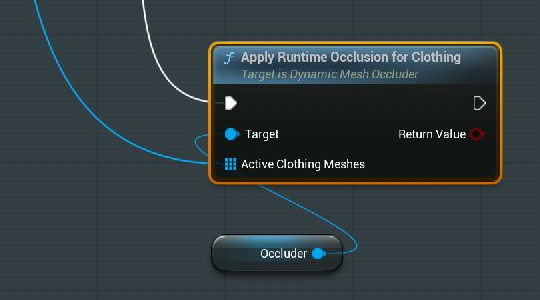
Connect the array to Active Clothing Meshes on Apply Runtime Occlusion for Clothing, with Occluder as Target. This direct runtime path does not require a mapping table. Mesh-asset nodes use reference geometry. If your wardrobe tracks posed Skeletal Mesh Components, use Apply Runtime Occlusion for Clothing Components and pass those components instead.
| Input or output | Type / example | Effect | When to use |
|---|---|---|---|
| Target | Dynamic Mesh Occluder component | Selects the component managing the body. | Use the component configured during BeginPlay. |
| In Body Component | Skeletal Mesh Component / Body | Records the original body and sets the swap target. | Set before the first request, or again when changing the managed character. |
| Active Clothing Meshes | Skeletal Mesh array / top and bottom | Defines all clothing that can cover the body. | Rebuild from the full active outfit on every change. Empty slots are ignored. |
| Async | Boolean / example true | Chooses the example's synchronous or asynchronous branch. | Move detection to a worker thread; final mesh creation and application still have game-thread cost. |
| Success | Boolean | Reports the completion result. | Clear Busy and handle failure in the completion event. |
| Occluded Mesh | Skeletal Mesh reference | Returns the generated result. | Inspect or update dependent state. |
| Hidden Triangle Count | Integer | Reports removed body triangles. | Use as a diagnostic for that outfit, not an FPS or GPU-time measurement. |
4. Bind Completion Before Starting Async Work
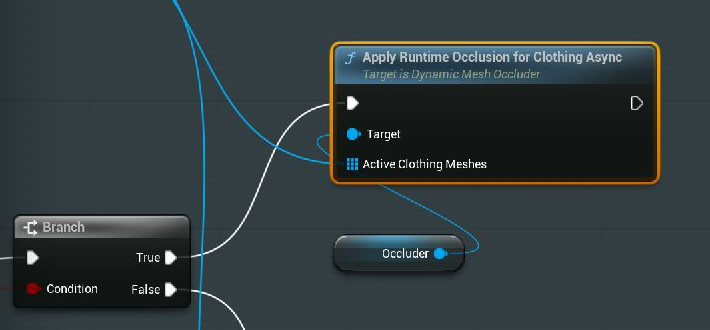
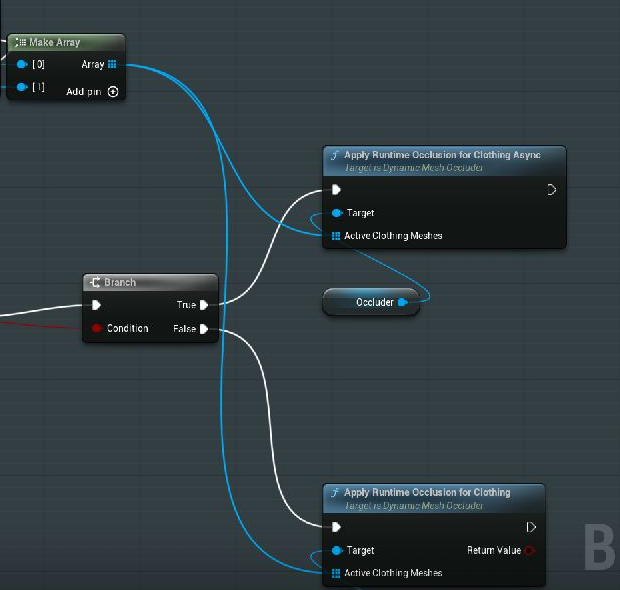
Bind On Runtime Occlusion Finished during BeginPlay, before any async request. In EquipOutfit, branch on Async and send the same complete array to Apply Runtime Occlusion for Clothing Async. Use Busy to prevent overlapping wardrobe requests.
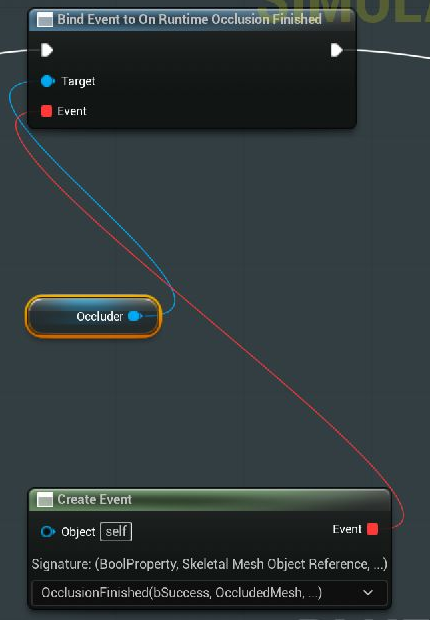
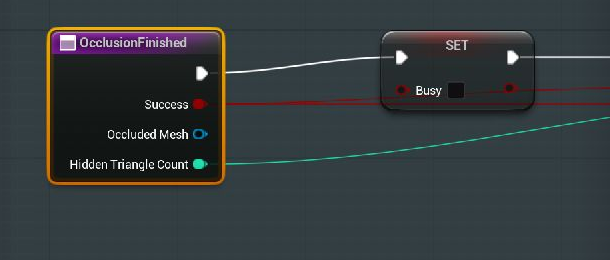
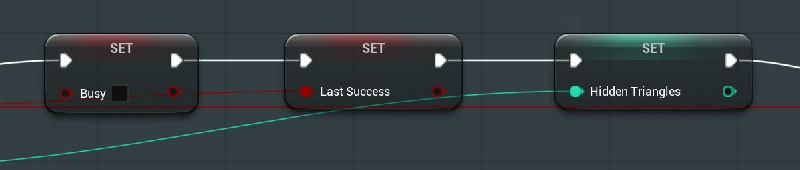
In OcclusionFinished, clear Busy, save Success and Hidden Triangle Count, and restore the original body if the request fails. Update the wardrobe UI from this result.
5. Inspect and Restore
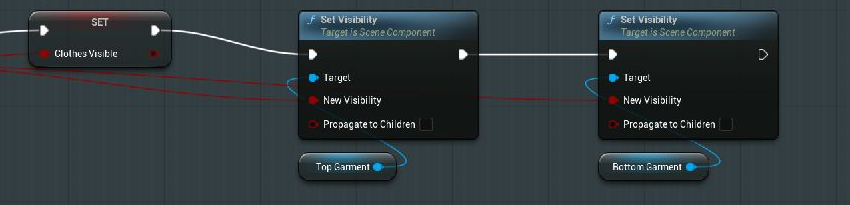
SetClothesVisible changes garment visibility only. Hide garments to inspect the trimmed body while the outfit remains equipped; show them again to check exposed edges during movement.
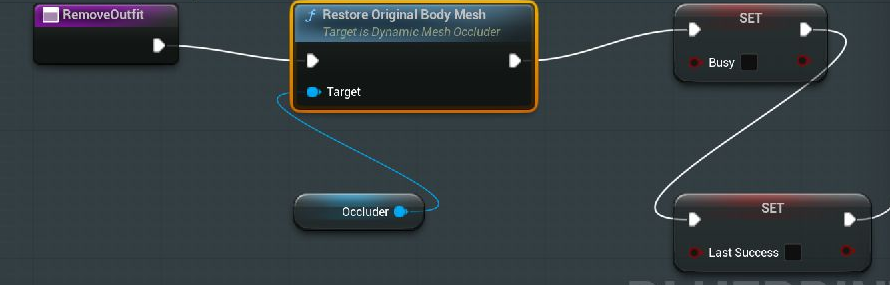
RemoveOutfit restores the original body and clears the garment slots. To remove just one piece, call EquipOutfit with the remaining outfit. If you also trim garments with layered outfit nodes, use Restore All Original Meshes to restore body and garments together.
6. Prepare Mesh Data for Packaging
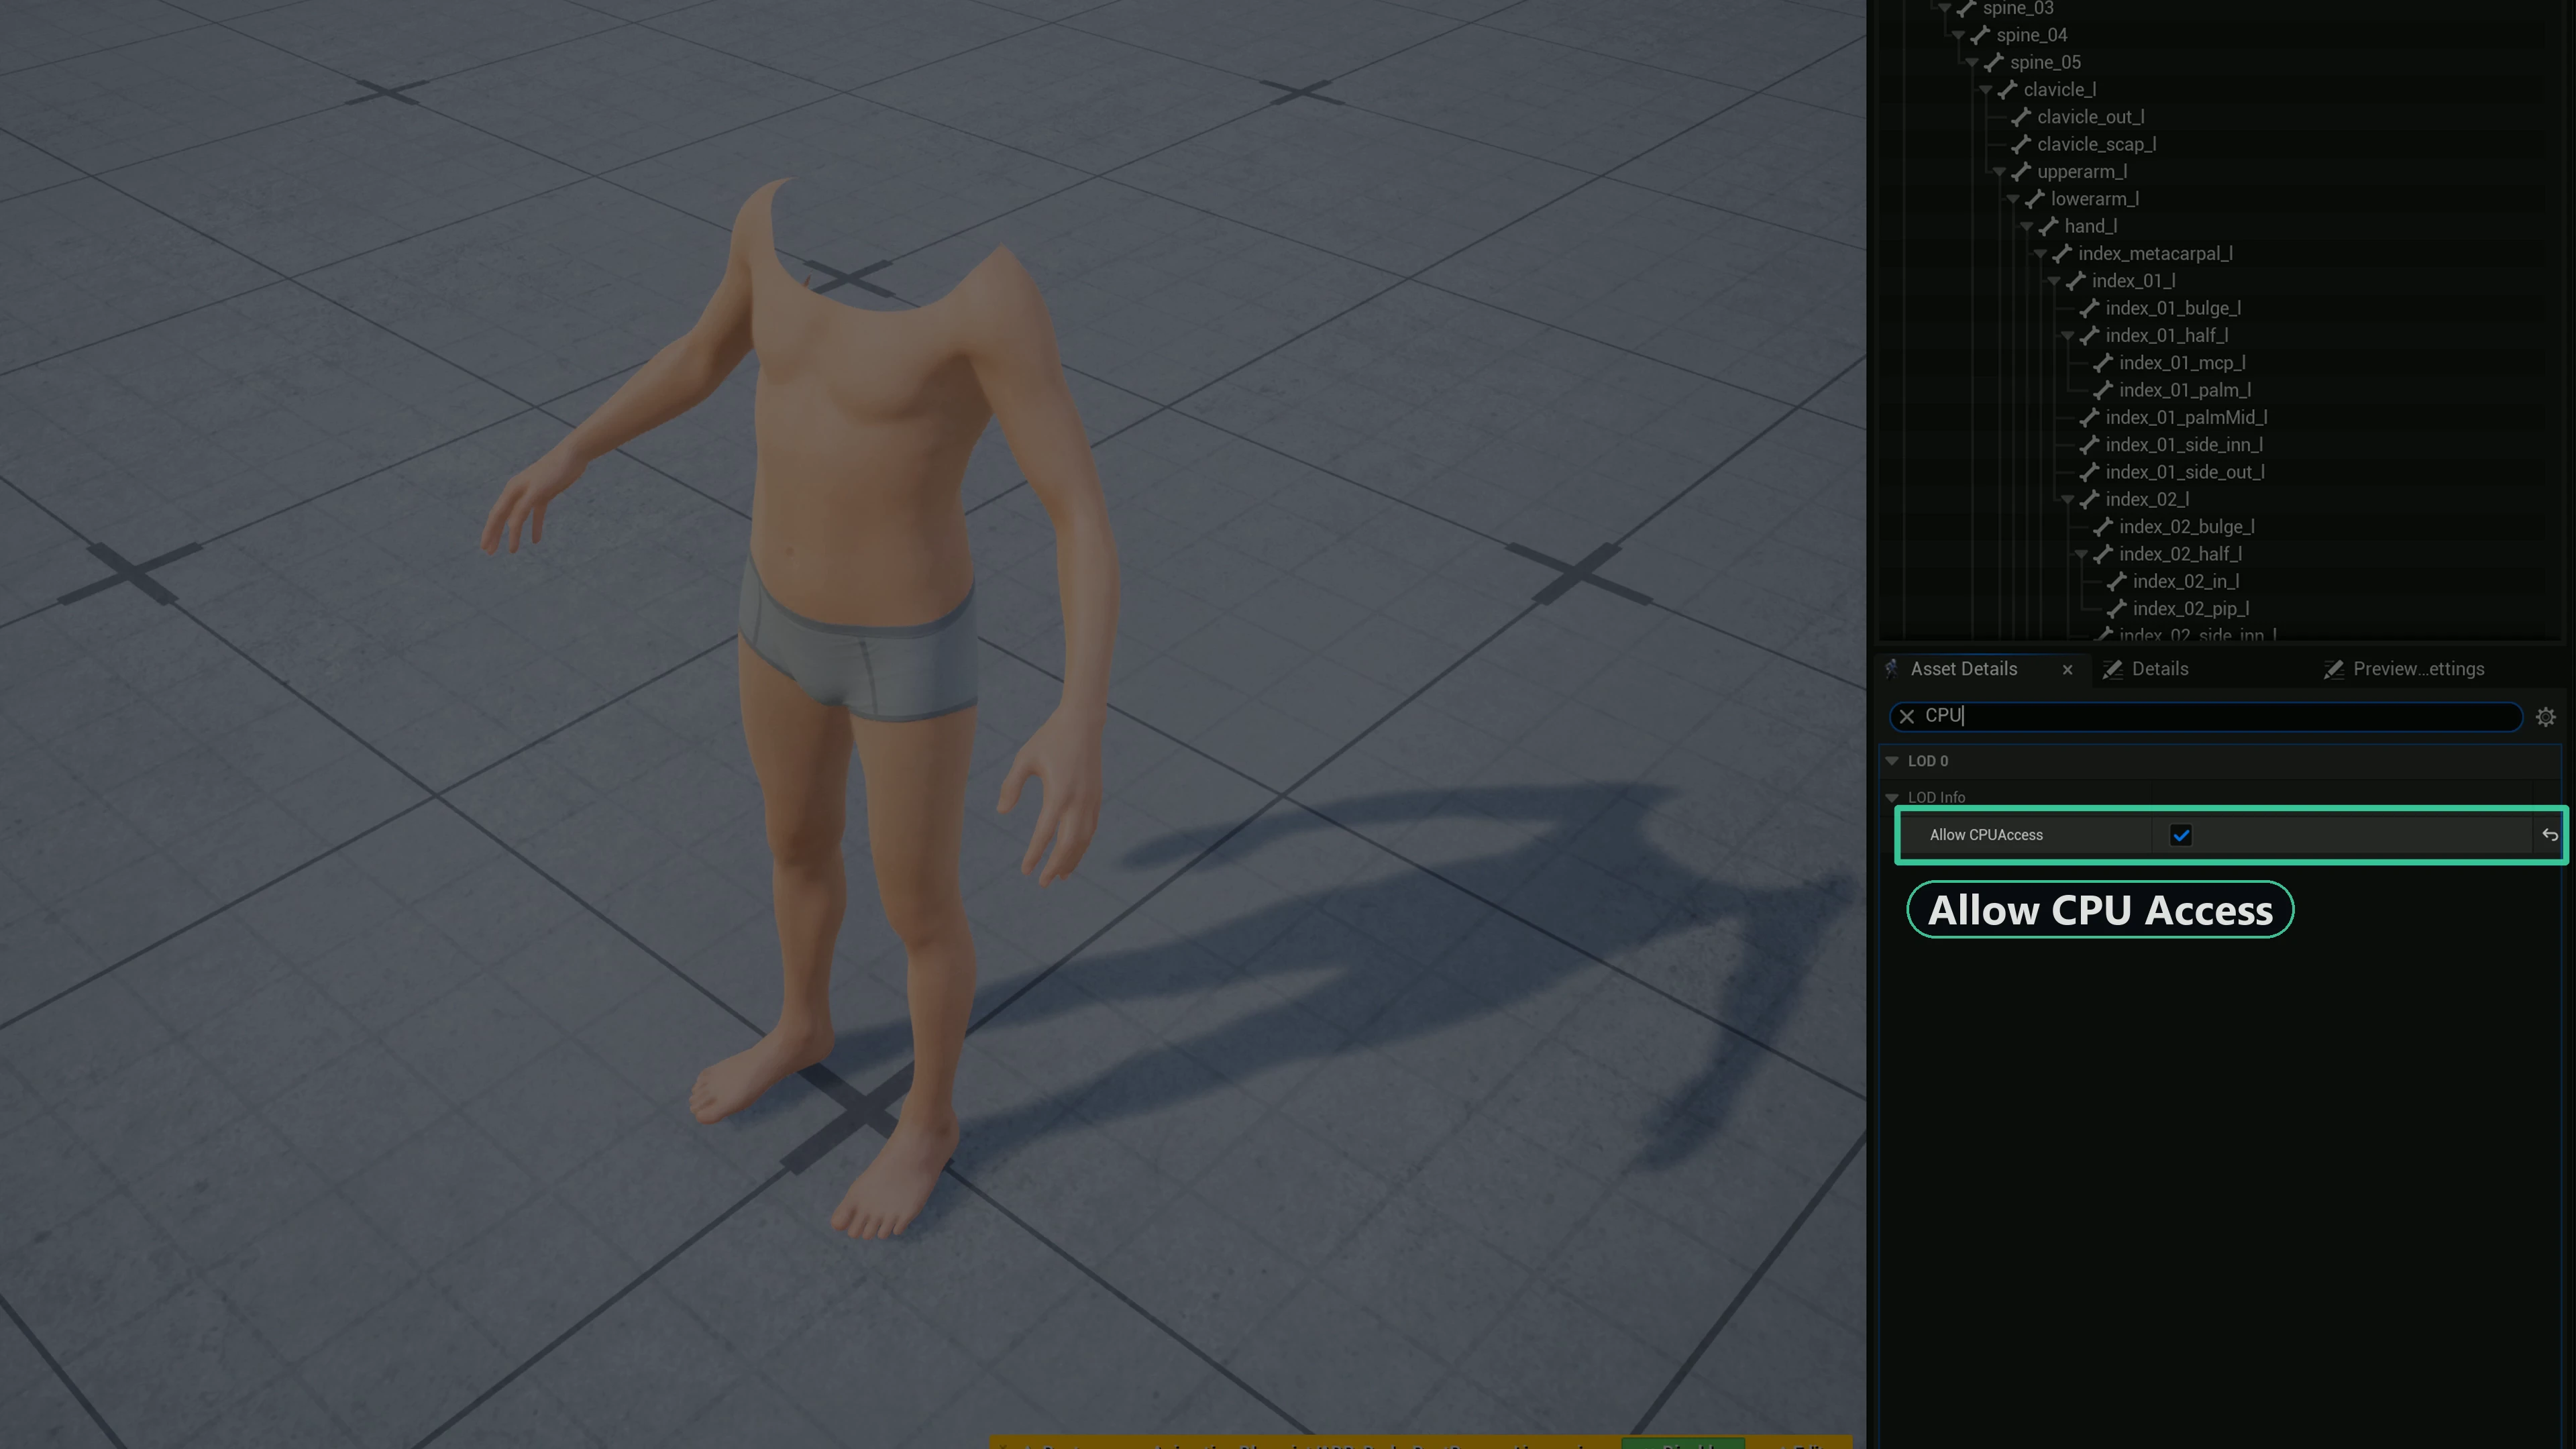
Open the source body and clothing Skeletal Mesh assets and enable Allow CPU Access. Keep LOD0 resident as described in Runtime Setup. Runtime meshes trim LOD0 and are transient. Test a packaged build with your actual meshes to verify cooked CPU data.
Continue with the playable third-person wardrobe to inspect outfit changes during movement.