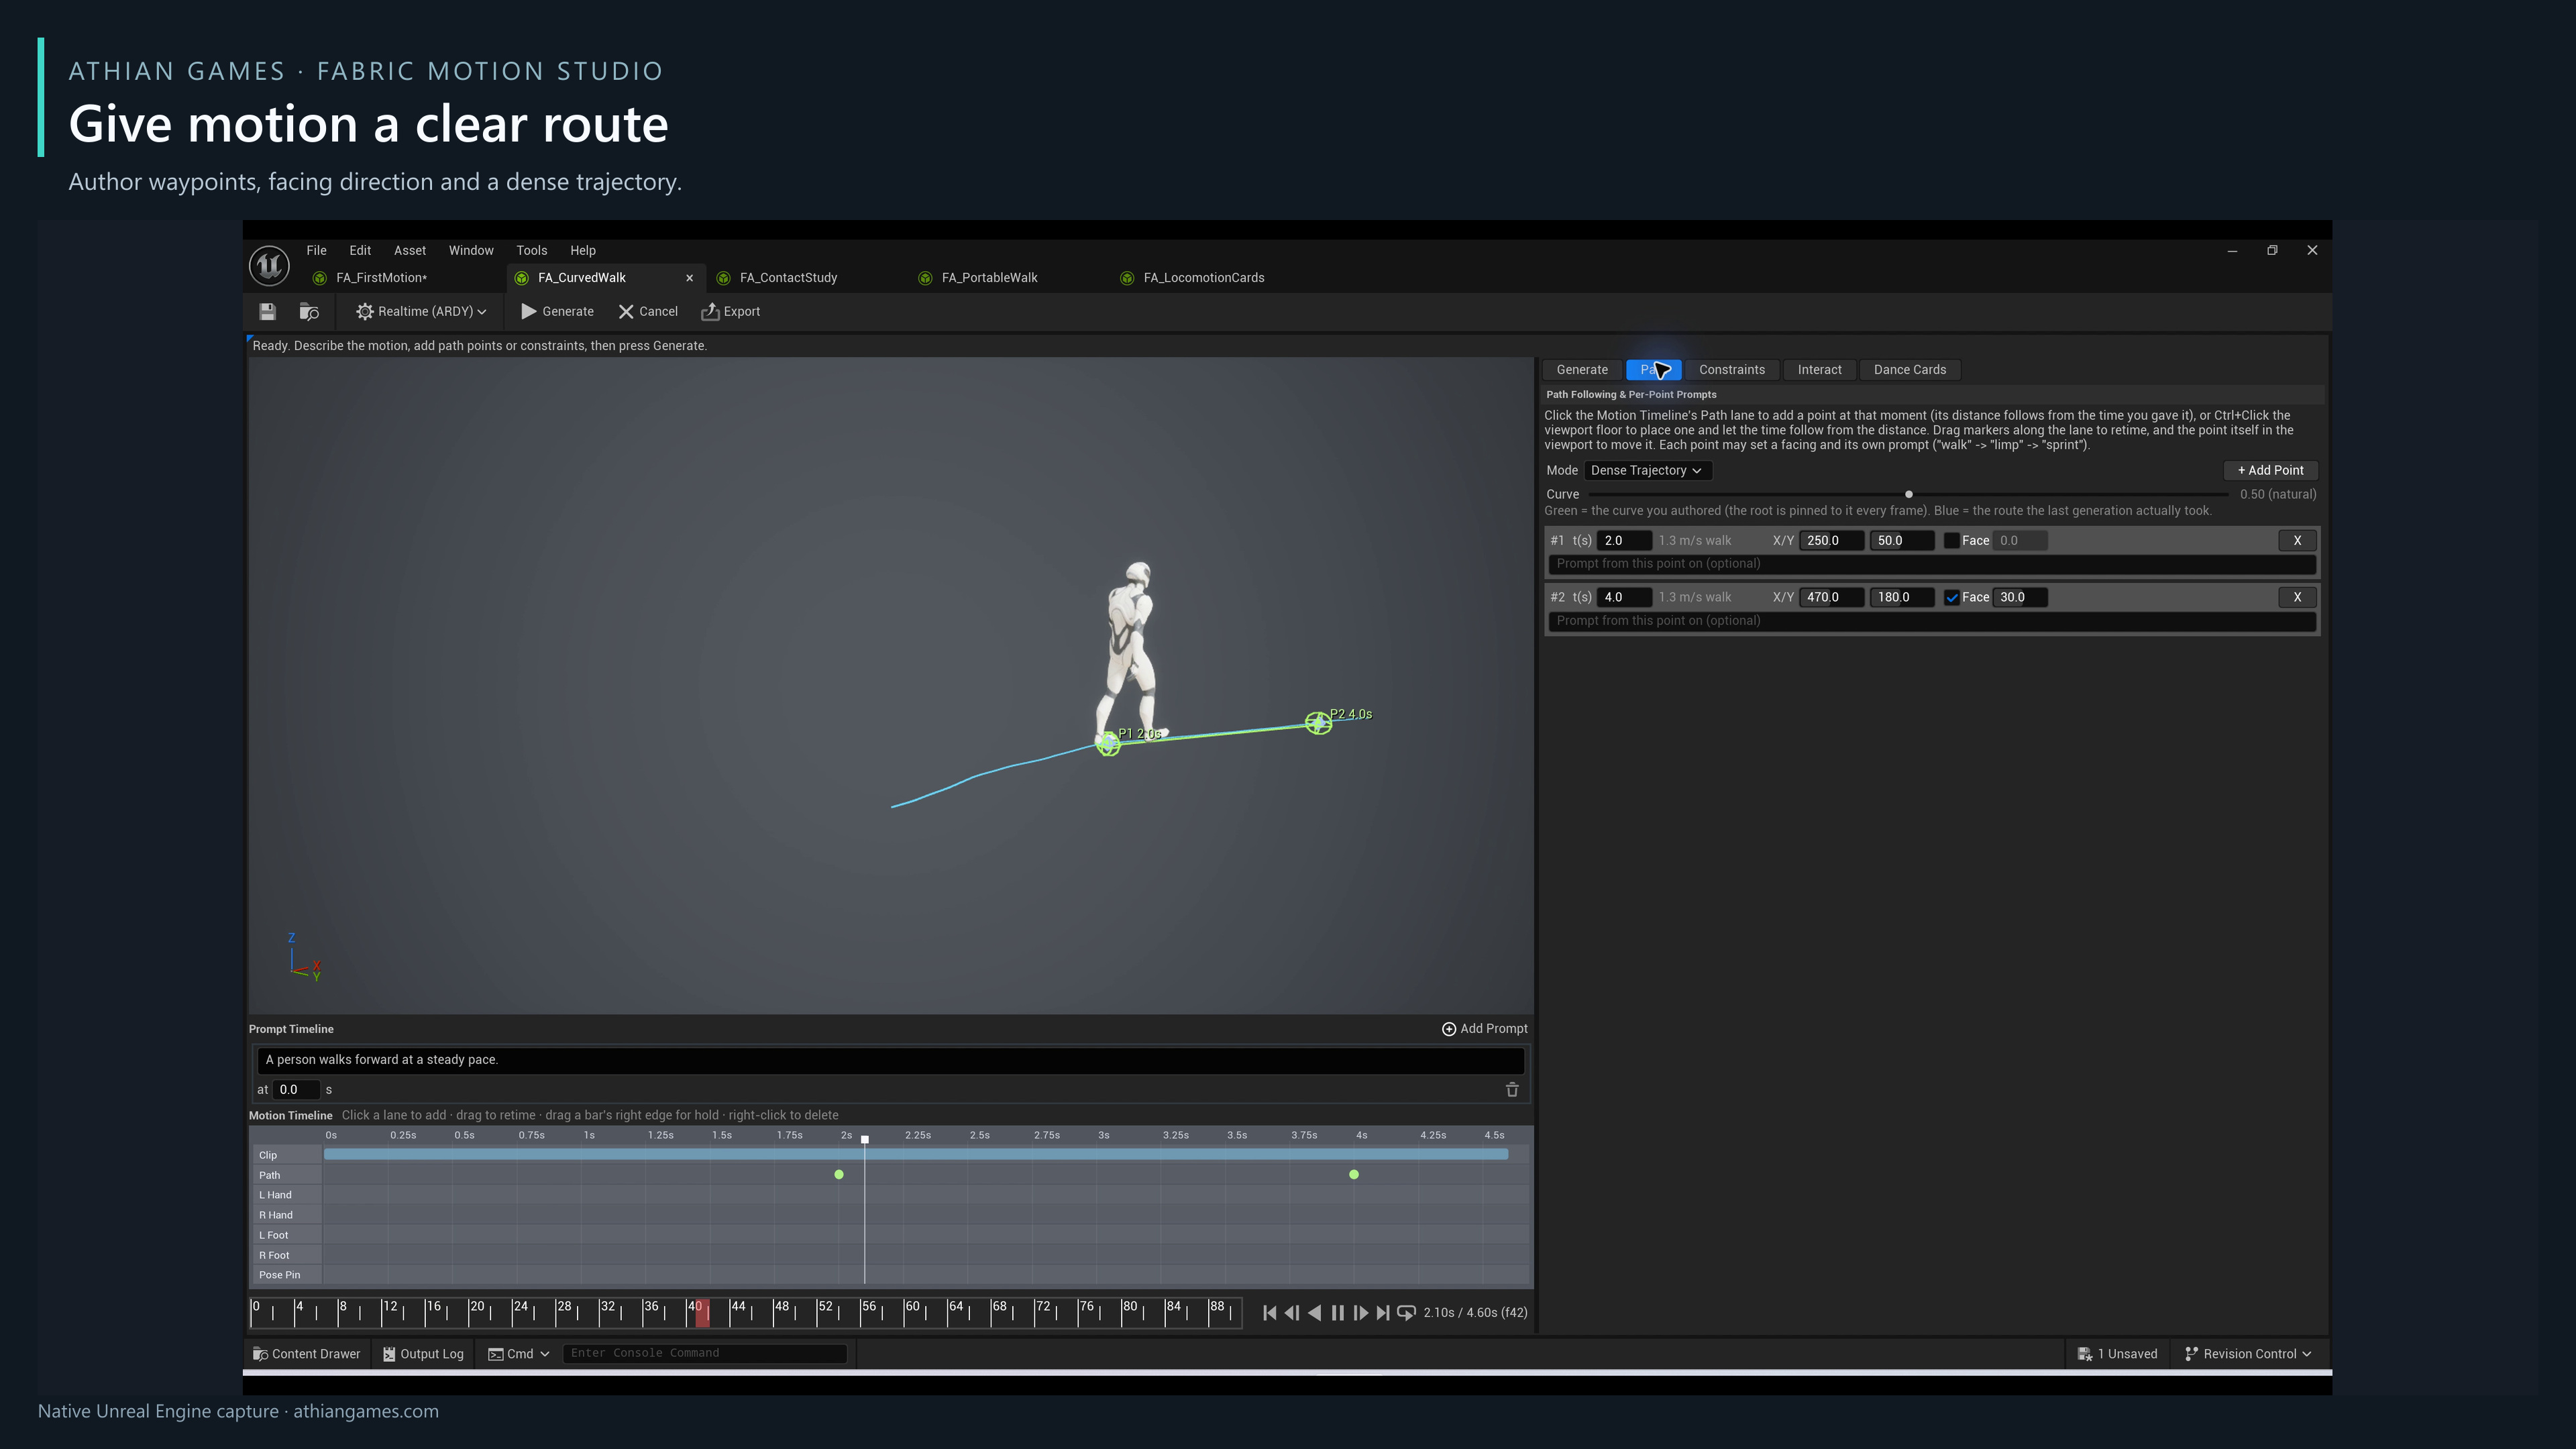
Author a curved walk
- Open FA_CurvedWalk and choose Realtime (ARDY).
- On Path, Ctrl-click the viewport floor to add waypoints. Select a point and move it with its viewport handles, or edit its position and arrival time.
- Choose Dense Trajectory for a controlled spline. Sparse Waypoints constrains the listed points and lets the model choose the route between them.
- Set heading constraints where facing matters. Use Path Curve Tension or a point's custom tangent to shape the curve.
- Press Generate, then inspect the actual motion against the drawn route. Export with the toolbar or Export AnimSequence.
| Parameter | Example or default | Effect and use |
|---|---|---|
| Position | UE centimeters | Ground-plane XY destination; path Z is ignored. |
| Time Seconds | Example: 2 and 4 seconds | Arrival time from clip start. Increase it if the distance requires an implausible speed. |
| New Point Speed | Default 140 cm/s | Times newly added points for an ordinary walk; it does not replace the timestamps of existing points. |
| Path Curve Tension | Default 0.5 | Controls Dense Trajectory spline curvature. 0 gives straight segments; higher values produce wider curves. |
| Heading Yaw | Example: 30 degrees | 0 faces +X. Enable Constrain Heading to apply it. |
| Live Update On Edit | Editable setting | Queues regeneration after edits. Allow each request to finish while reviewing; use manual Generate during deliberate parameter comparisons. |
Future Crop Seconds limits the model's look-ahead window during rollout; zero uses the model maximum. A positive value also applies to single-prompt clips. Live Update On Edit uses fast preview settings without full post-processing; use Generate to review final contact quality.
Contacts and staged interactions
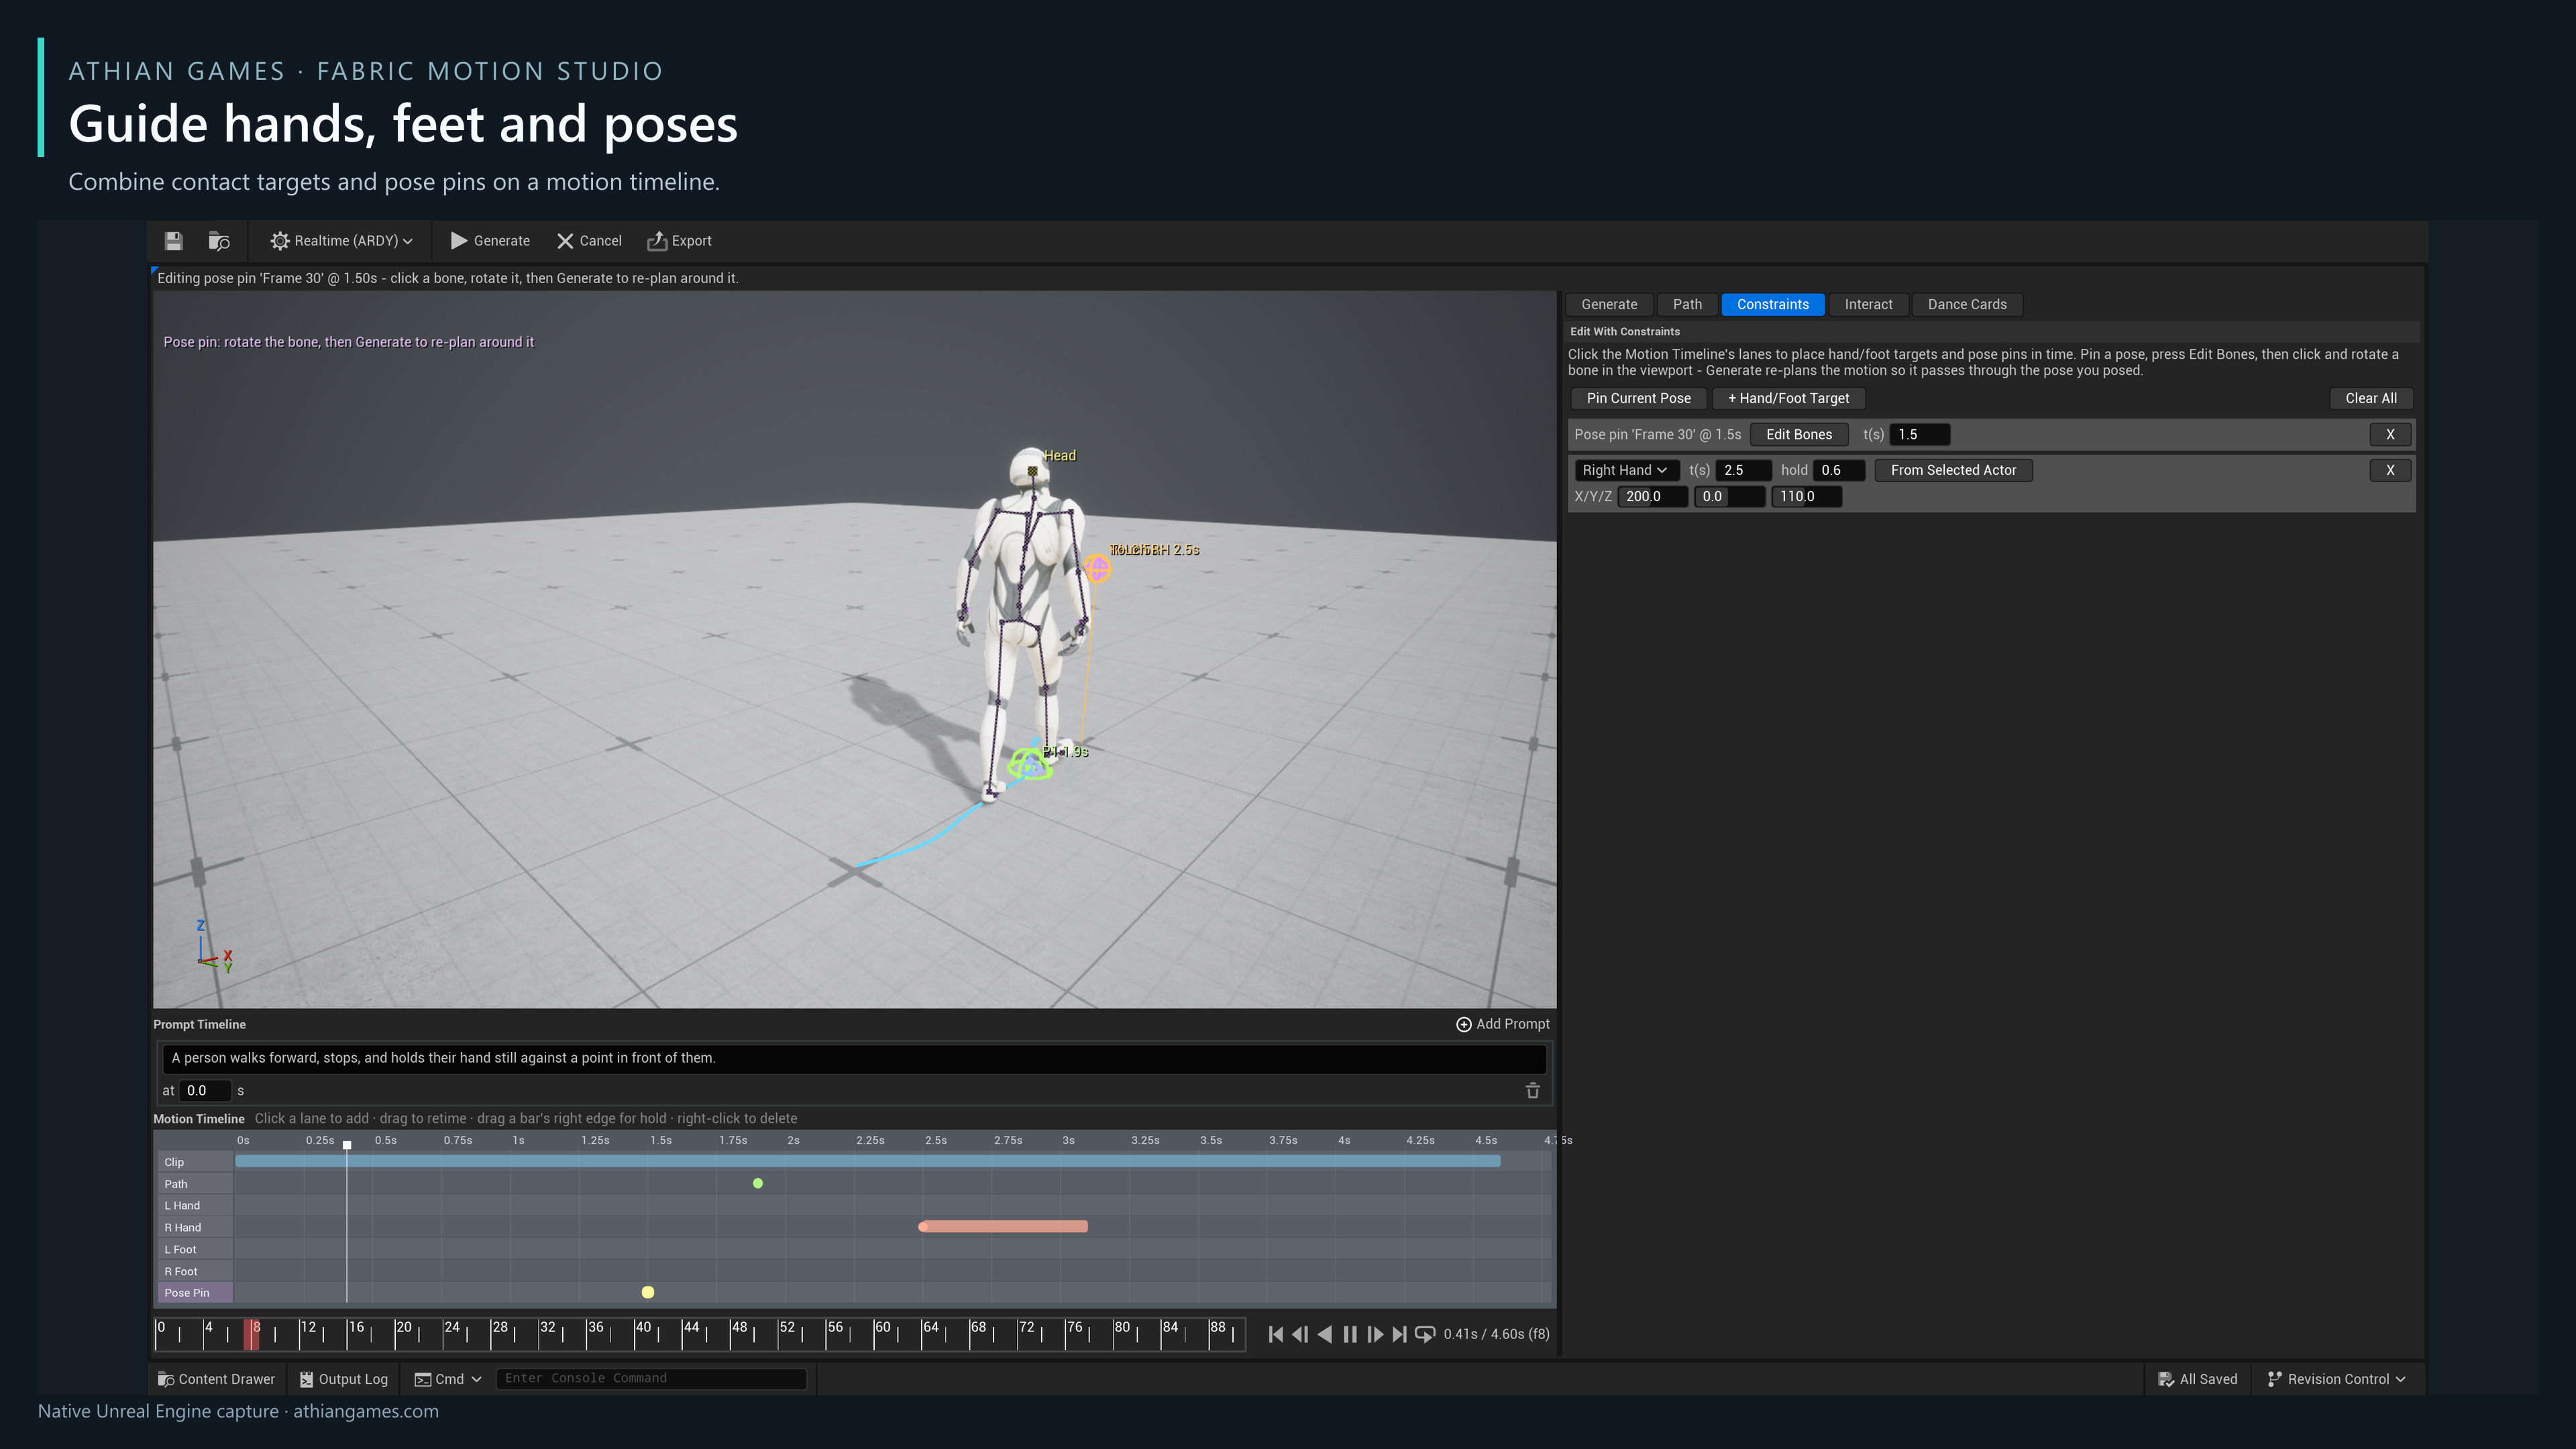
Open FA_ContactStudy. The Interact tab offers Open Door, Push Object, Pick Up, Touch Point and Custom templates. Configure the hand, contact point, approach time, hold time and facing, then press Stage. Staging creates editable prompt, path and effector entries; it does not operate the scene object or generate motion by itself. Press Generate afterwards.
On Constraints, use + Hand/Foot Target or click a hand/foot lane in the Motion Timeline. Edit X/Y/Z in centimeters, the contact start in seconds and its hold duration. From Selected Actor copies the selected level actor's location; place the actor at the intended contact point. A handle on a door is a better target than the door's center.
During preview, press Pin Current Pose to capture a full-body key. Select Edit Bones, click a bone handle and rotate it, then Generate to re-plan through the edited pose. A pin is a constraint on a new generated motion, not an animation key inserted directly into an exported sequence.
Drag timeline entries to retime them, drag a contact bar's right edge to change its hold, and right-click an entry to delete it. Use physically reachable targets and review contact accuracy on your target skeleton.
An existing contact replaces the staged contact only when it uses the same hand or foot, has a nearby target, and covers the entire staged hold. Contacts at separate times or with only partial overlap are kept.
ARDY preview and export correct mapped hand/foot chains for the target character's proportions during an explicit contact hold. The correction preserves bone lengths and end-effector orientation, and blends in and out over 150 ms around the hold. Targets outside the limb's reach stop at its reach limit. Check the approach, hold and release on your target skeleton.
Root-motion export rebases the first kept ground position and facing to the clip's local origin. Contact targets follow that same transform, so their exported coordinates differ from the scene coordinates used while authoring. Place the exported clip at its original start position and facing to align it with the authored scene targets.