Create the asset
- Content Browser > right click > Create Advanced Asset > Physics > Other > Mesh To Groom Converter (same category path as Groom Asset).
- Double-click to open the Mesh To Groom Editor: viewport on the left, parameters on the right, toolbar across the top.
First conversion
- Import a sculpted wig or hair cards as a Static Mesh (or Skeletal Mesh).
- On the selected layer, add Hair Elements - one entry per piece (fringe, ponytail, side locks), each with its own Mesh and Transform. Click a piece in the viewport to move it with the gizmo.
- For character hair, set Target Skeletal Mesh to the face or head you will bind to. For a standalone geometry study, leave it empty and choose Roots > Top Slice Along Axis; orient Growth Axis toward the root region and inspect the root count in Report.
- The viewport converts as you type. Tune Conversion / Style / Appearance on the selected layer, then groom with the brushes on the left edge of the viewport.
- Press Convert to see the full Strand Count. Live preview uses a reduced budget.
- Set Output Path and press Save Groom. With a Target Skeletal Mesh set, the
UGroomBindingAssetis always created or updated alongside the groom. Re-saving rebuilds the same binding in place. - Save the new packages (Ctrl+Shift+S).
- On the character Blueprint, add a Groom Component, assign the generated Groom and Binding, and attach it to the Face component.
- Set Preview Body Mesh and press Animate to judge the hair under real motion before you commit.
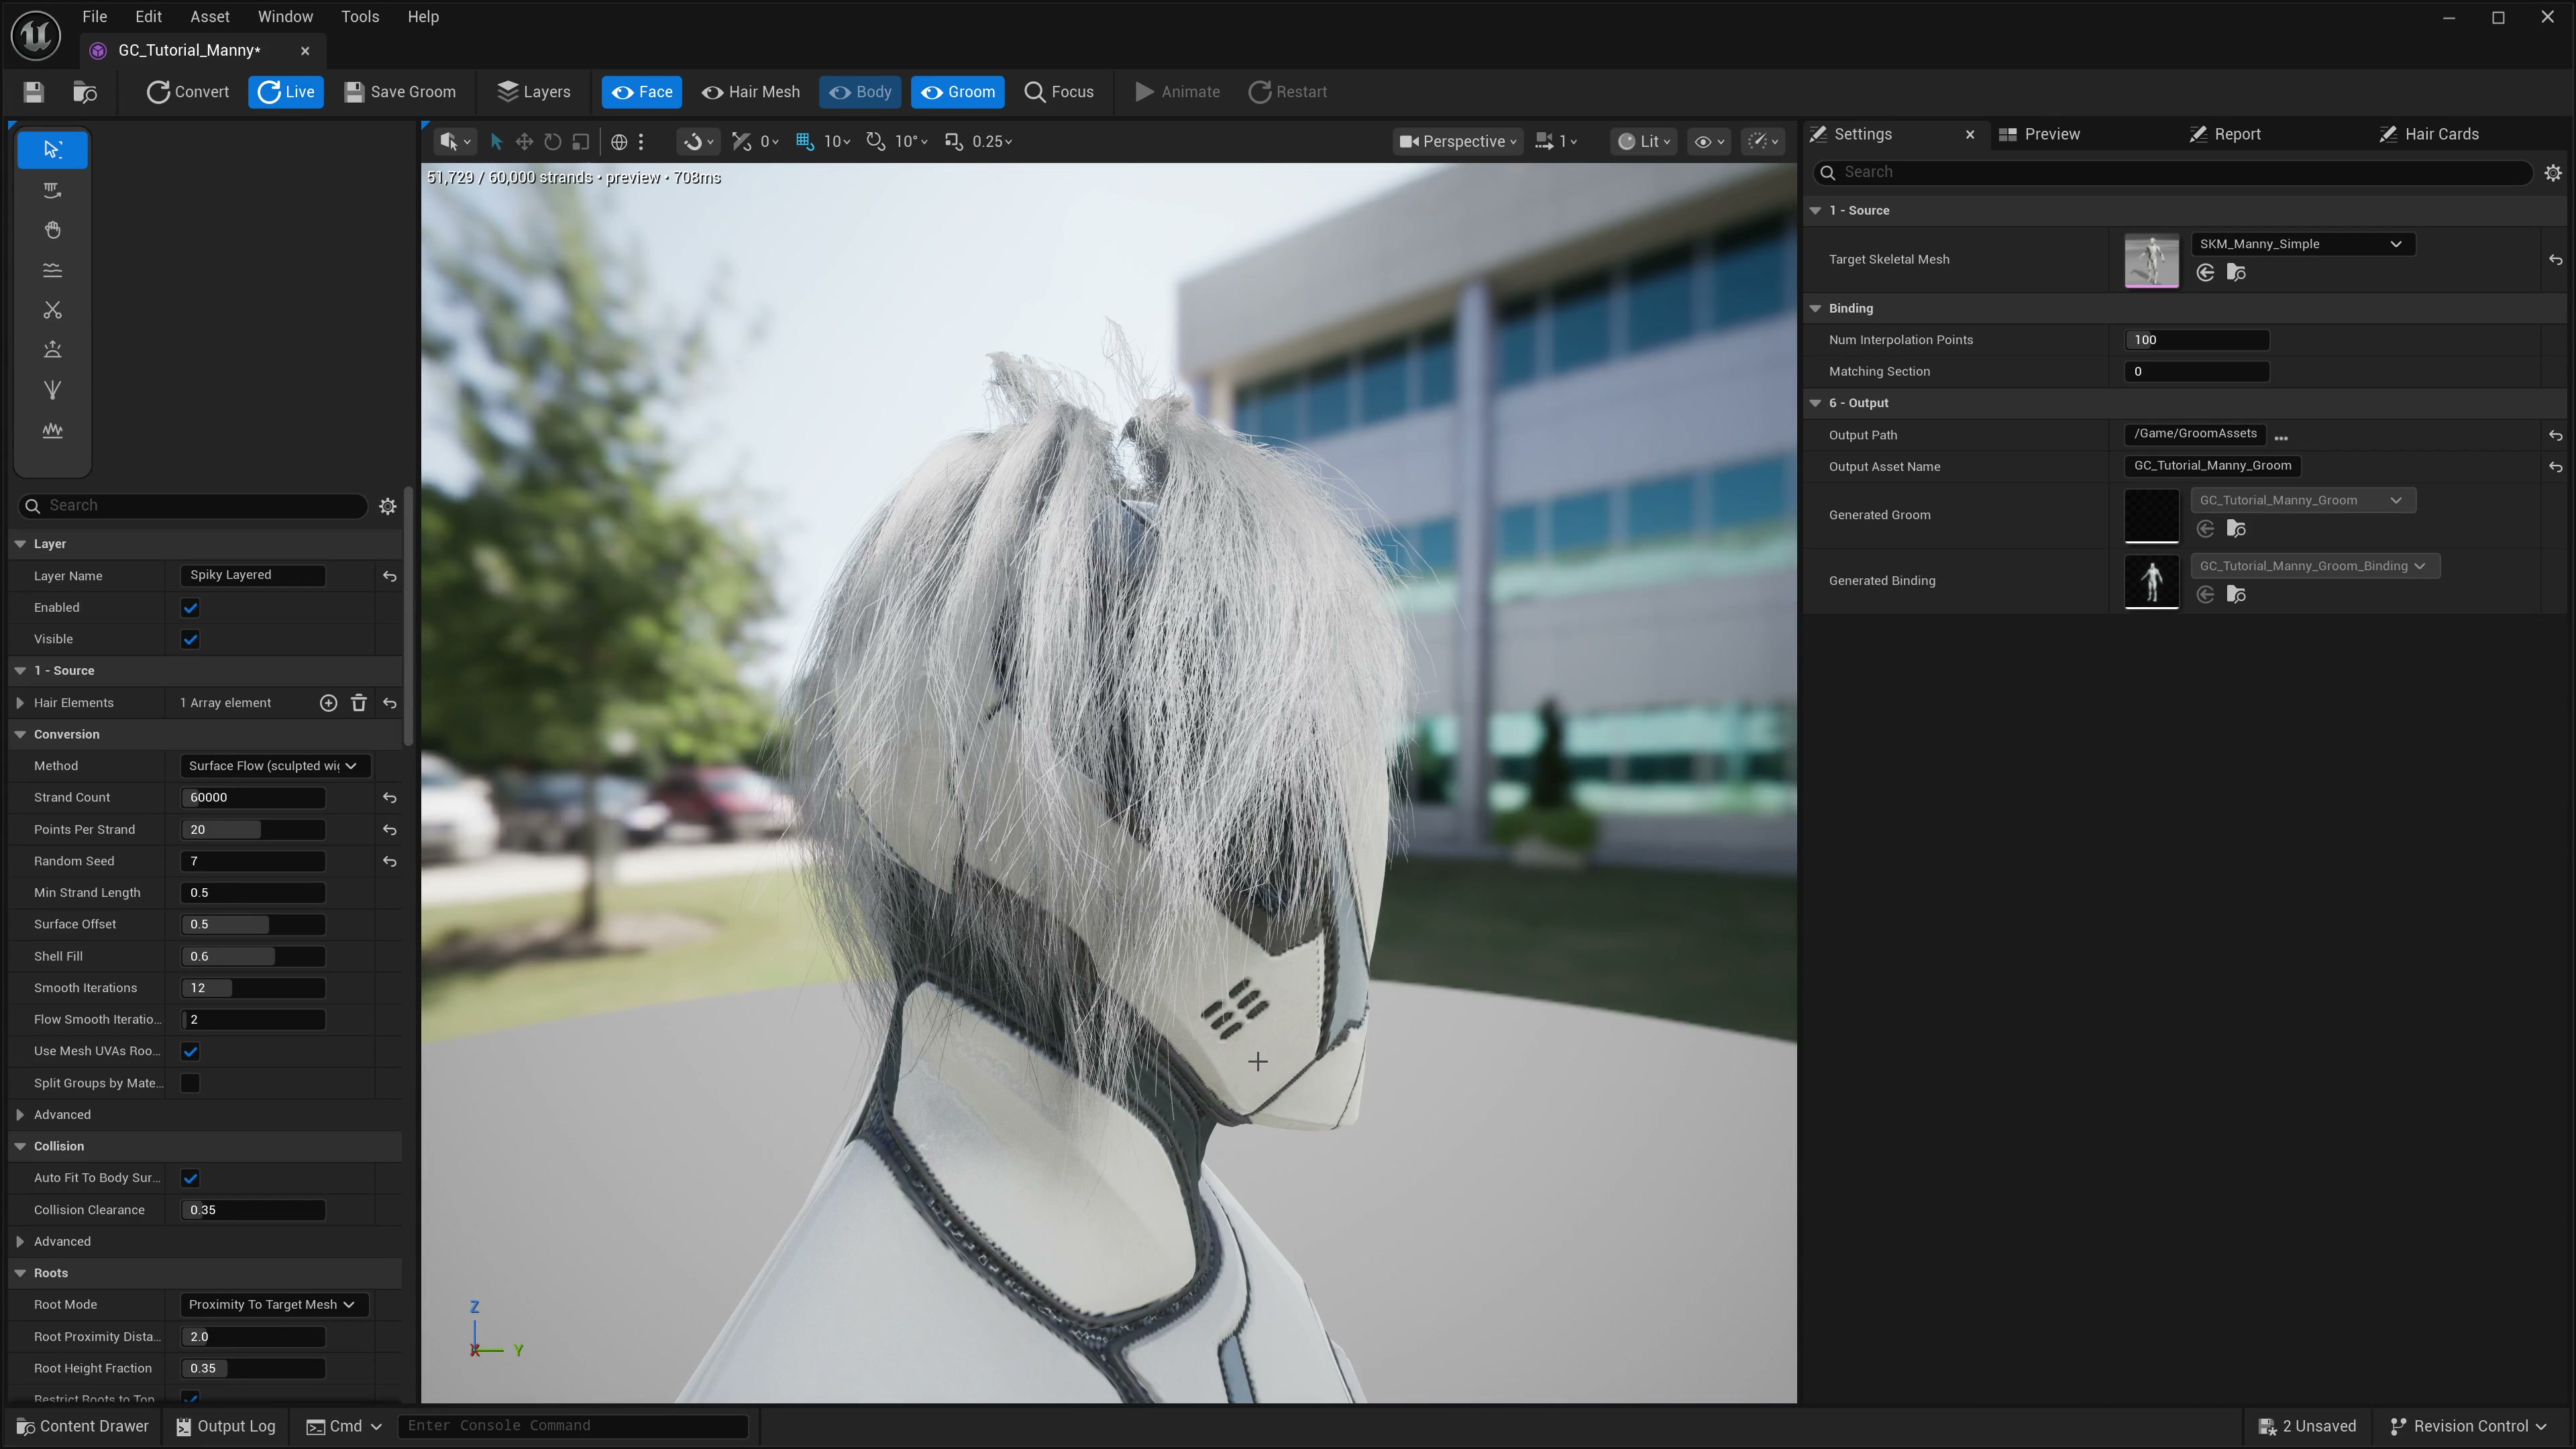
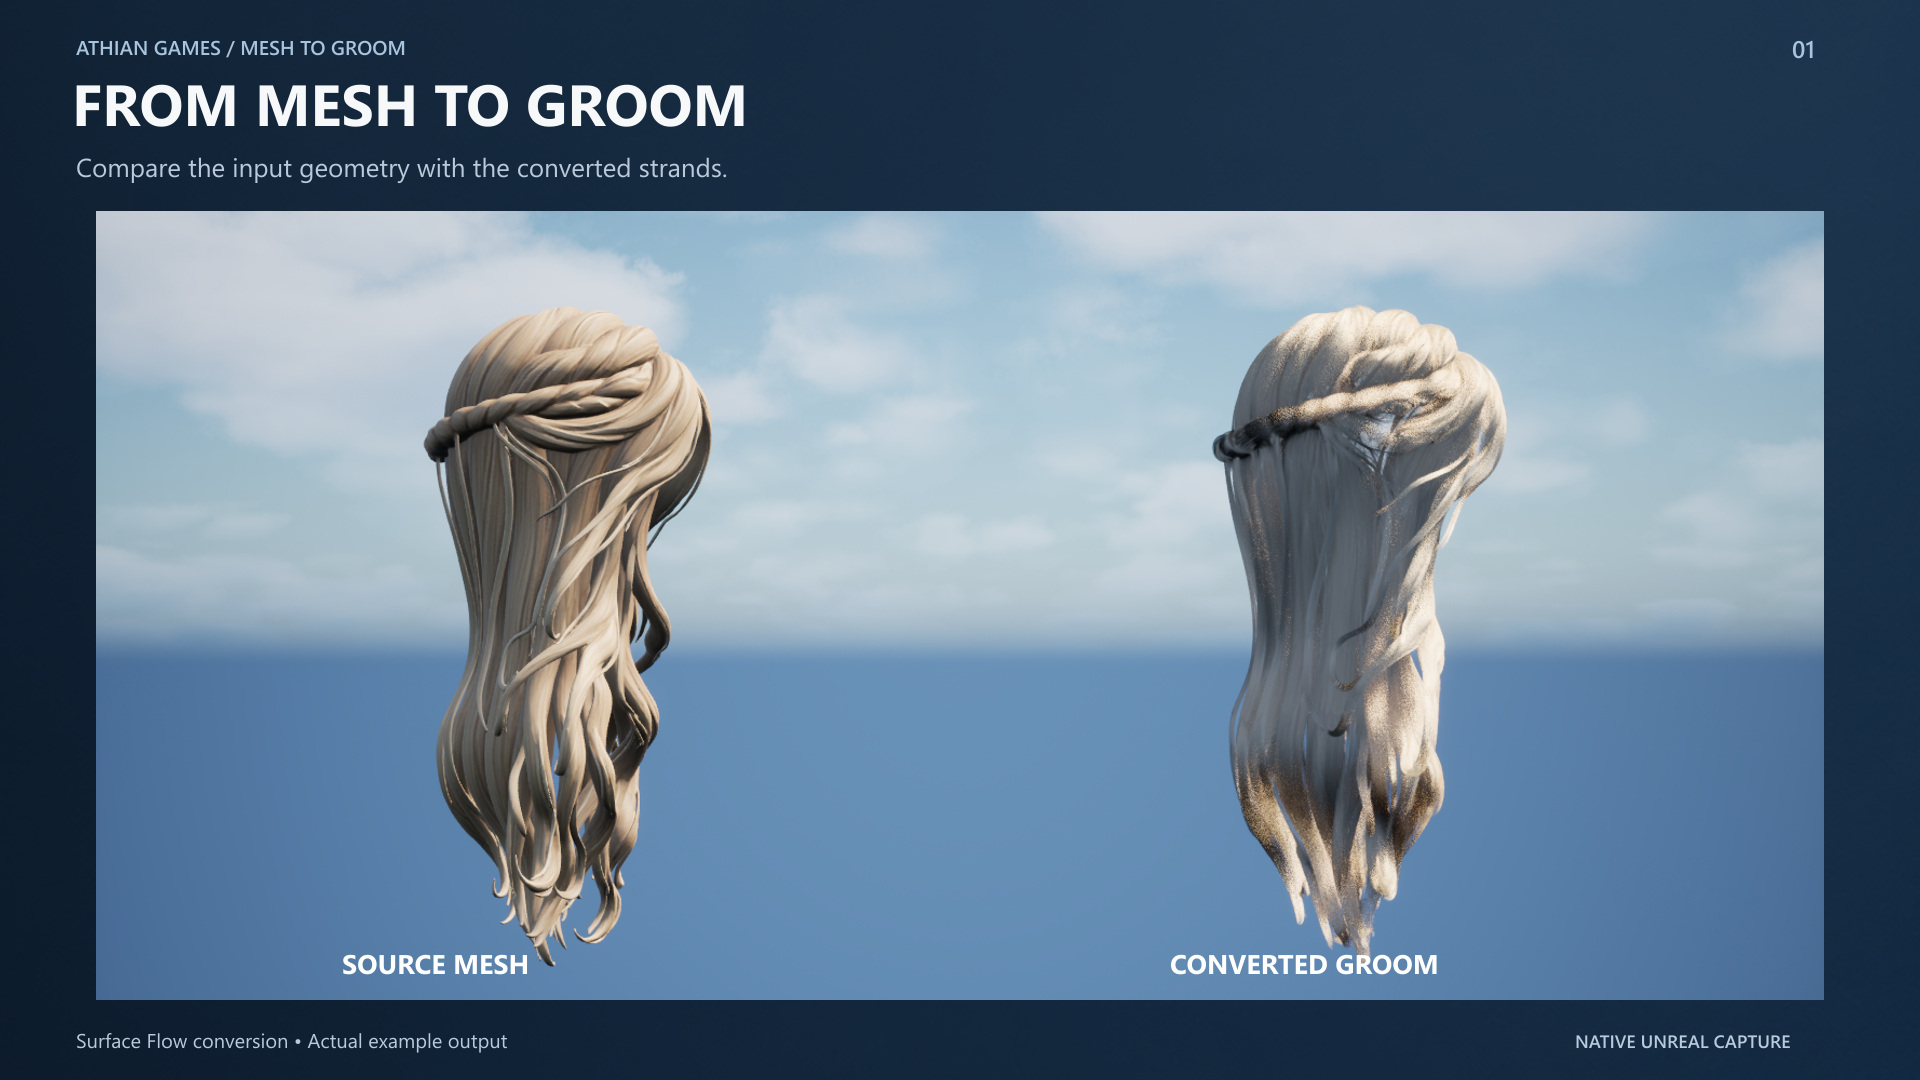
Bind deforming character hair. A standalone Groom can be saved without a skeletal target. To follow a deforming character, assign the matching Groom and Binding to its Groom Component and inspect the result during animation.
Try the original geometry examples
Install the plugin before opening the separate MeshToGroomExample project. Its default L_Overview map compares original braid and ribbon meshes with their saved strand output. The example contains geometry exercises, rather than characters or binding targets.
- Open Content > MeshToGroomExample > Recipes and duplicate M2G_Braid or M2G_Ribbons before experimenting.
- In M2G_Braid, inspect Surface Flow with a 50,000-strand budget, 64 points per strand, and three ordered Flow Guides. Compare the source crossings with the output; extraction approximates the braid and can leave noisy or incomplete coverage.
- In M2G_Ribbons, inspect Card Centerline with 64 Strands Per Card. Five separate ribbons produce 320 strands; the Surface Flow Strand Count does not control this method.
- Change one setting, press Convert, then inspect the result from several angles. Choose a new Output Path before saving an experiment.
These examples leave Target Skeletal Mesh empty and simulation disabled. Use your own compatible skeletal mesh to test character binding and animation.
Conversion methods
| Method | Use for |
|---|---|
| Surface Flow | Solid / sculpted wigs (Tripo, ZBrush, Blender). Traces geodesic flow lines from the scalp band down the mesh surface. |
| Card Centerline | Card / ribbon hair. Each connected component becomes a card; centre lines are extracted along its long axis. Emits Strands Per Card times card count and ignores Strand Count. |